Roll out your homemade or pre-made fondant until it’s about 1/8″ thick.
Using your skull-shaped cookie cutter, cut out as many skulls as you have cookies. (Optional: If your cutter is also a cookie stamp, stamp the design into the fondant after it’s cutout.)
Using your wide paint brush, lightly brush a small amount of corn syrup onto the cookie, then place the cutout fondant skull onto the cookie. Using your fingers, smooth out any bumps.
Place 1-2 drops of each gel food coloring you’re using into separate small ramekins (or a ceramic egg holder works great for this!), then add 1 drop of vodka to each color. Wait a few seconds, then mix together with a paint brush. Do this for every color (the vodka allows the food coloring to dry quickly).
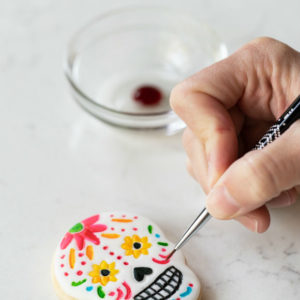
Time to start decorating! I find it’s easiest to paint your “anchors” first, which are the eyes, nose and mouth. The great thing about Day of the Dead designs are that they are very unique and personal, and there are no wrong options! Using your different colors, try painting different swirls, flowers and dots all around the face until you’re happy with your design.
Set cookies on a cooling rack to dry. Enjoy! 🙂