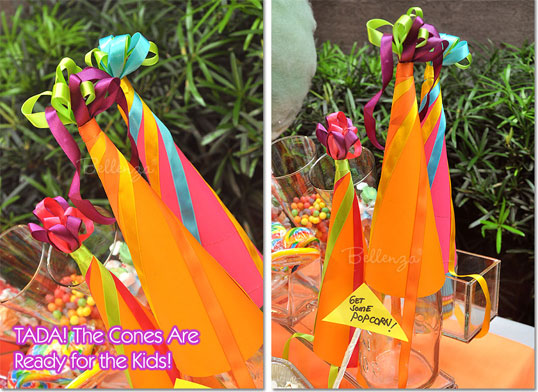
Today I am thrilled to have the ladies of Bellenza guest-posting for me! I love their enthusiasm for parties and weddings- their site is full of fabulous ideas! And so, I welcome them as they show us a great idea for making clown party hats to go on top of containers for cute take-home party favors! You can use milk bottles or any other bottle for the best effect! Have the kids fill the bottles with treats and top with a hat! So cute!
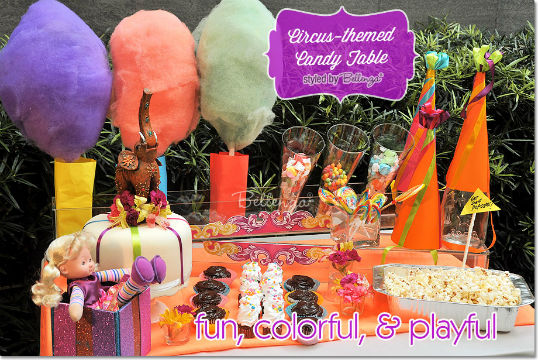
First of all, a warm hello to all The Party Wagon readers! And a huge thank you to Lydia Menzies for choosing to feature Bellenza’s fun favor-packaging project for a Circus-themed Party: candy cones inspired by clown hats!
Do you have this theme lined up for a party soon? If not, this favor idea might just convince you. It’s a super-easy project, we promise. So step right up, folks. Clown Hat Favor Cone making is about to begin!
Circus Favor Packaging in 7 Simple Steps
Step 1: Gather these easy-to-find materials.
- heavy card stock in different festive colors
- satin ribbon also in assorted colors
- a pair of scissors
- white craft glue
- double-sided tape
Step 2: Create the basic cone shape.
- Take a sheet of card stock and roll it up in a cone shape. Leave a small opening at the pointed end (about 1/4 to 1/2-inch in diameter). This will be needed in Step 6 below.
- The open end can be as wide or as narrow as you wish, as long as there’s enough overlap to make the cone sturdy.
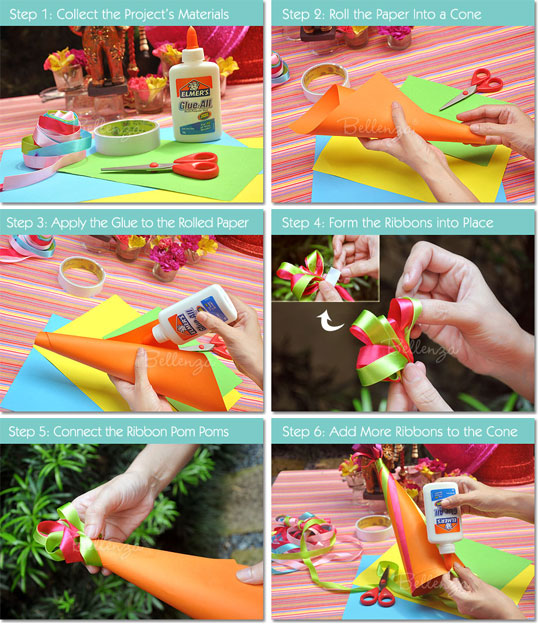
Step 3: Secure the cone shape and trim off the excess paper.
- Seal the overlapped edge of the card stock with craft glue (or double-sided tape). Let the glue dry completely.
- To make a neat edge for the cone, trim off the excess paper at the wide end.
- Repeat this procedure for as many cones as you need.
Step 4: Make DIY “pompoms” out of colored ribbon.
- Create cute pompoms by looping 2 or 3 colors of ribbon back and forth several times.
- Gather one end of the loops and bundle them together with double-sided tape. Note: Don’t peel off the backing of the tape at this point.
- Repeat this procedure for as many pompoms as you need. Combine different colors of ribbon for each cone for a really festive look!
Step 5: Attach the pompoms to the cones.
- Peel off the remaining backing of the double-sided tape from around the ribbon pompom.
- Insert the taped end of the pompom into the hole you had provided in each cone, and press firmly around the opening to make sure that the tape holds well.
Step 6: Dress up each cone with more ribbon trimmings.
- Glue ribbons in a fun mix of colors onto each cone.
- Create varied patterns, like spirals, stripes, multi-colored bands, or even looped or zigzag borders at the wide end of the cones.
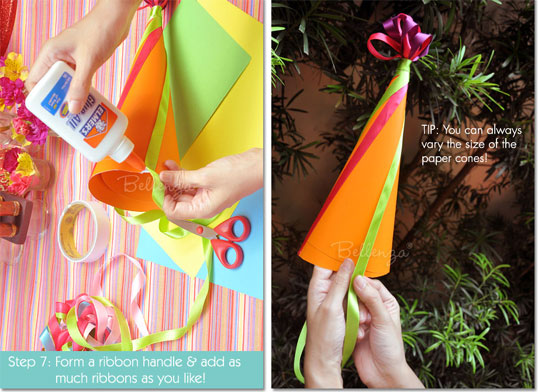
Step 7: Attach a ribbon handle and add your own finishing accents!
- Create a handle by gluing a length of ribbon down one side of the cone, then extending it beyond the open rim and back up to the other side. Let the glue dry thoroughly.
- Feel free to add other fun trimmings—paper polka dots, stickers, felt cutouts, rick-rack, sequins-in-a-row (available in craft supply stores), and the like.
Step 8: Let the kids fill the cones with their choice of treats!
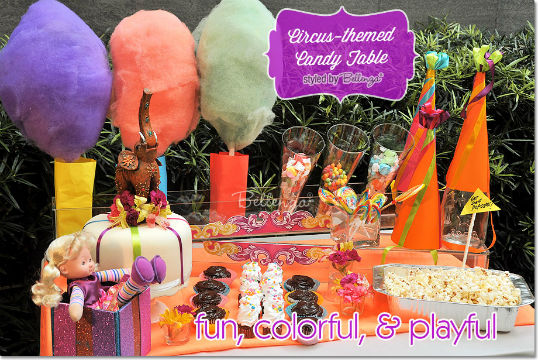
Come party time, set up a “fill your own favors” station with these clown-hat cones standing by. Then, have the little guests scoop in their favorite sweets!
A huge thank you to Lydia for having us share this festive favor packaging idea with all of you. Such a thrill to be featured on The Party Wagon, a site we’ve been following for years!








Responses