

Today, I am bringing back one of my favorite cake and cookie designers to help teach us all a little more about creating show-stopping desserts! I asked my friend, Julie, of For Heaven Bakes, to share tips that we regular folks could use to up our decorating game.
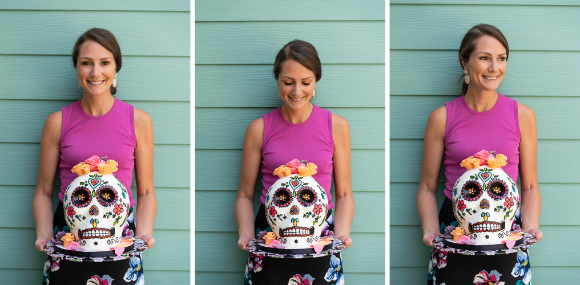
Julie created a jaw dropping (LOL) dessert and she is going to tell you all about it! Read on to hear from Julie…and to see how she created the cookies to complement this cake (insert that jaw drop here)…
Julie says…
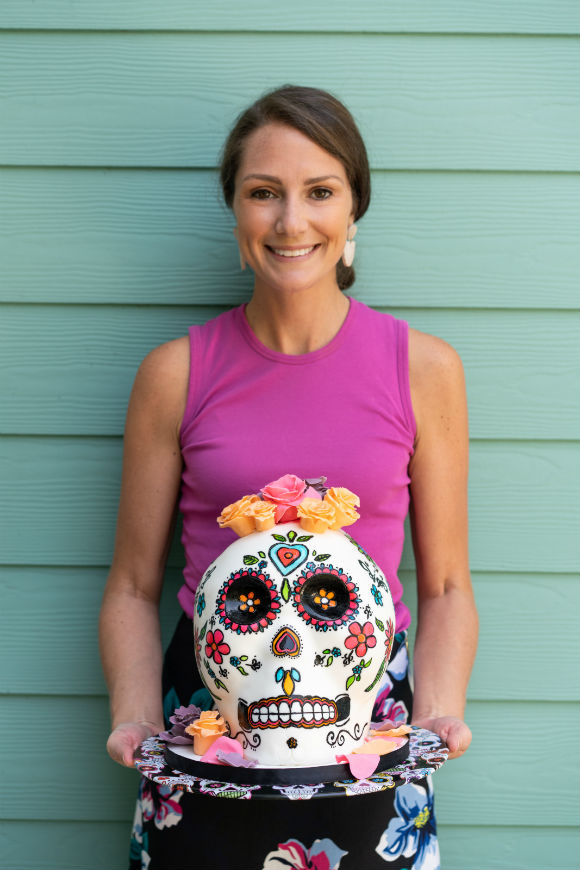
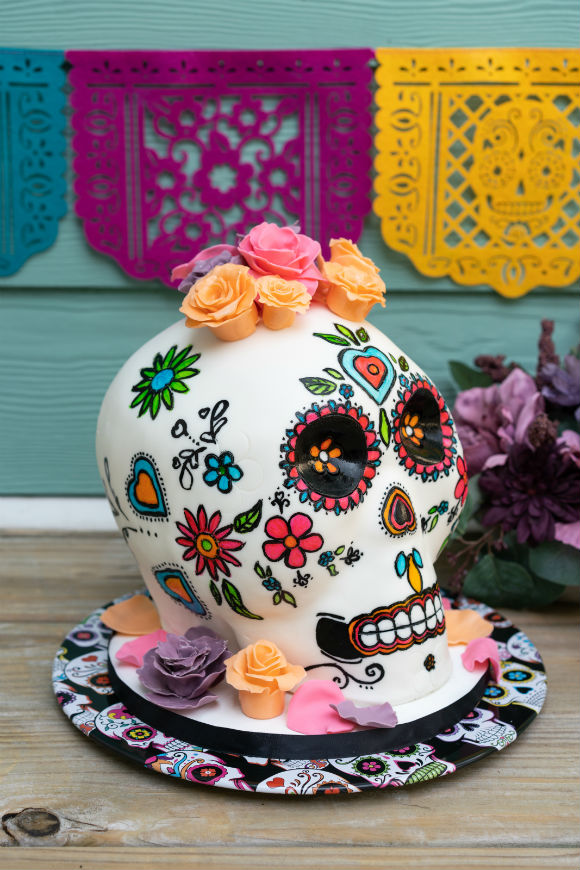
For Halloween this year, I wanted to do a cake that was fun and colorful, and not just limiting the colors to the traditional orange and black. A Day of the Dead-themed party cake and cookies were perfect for this!
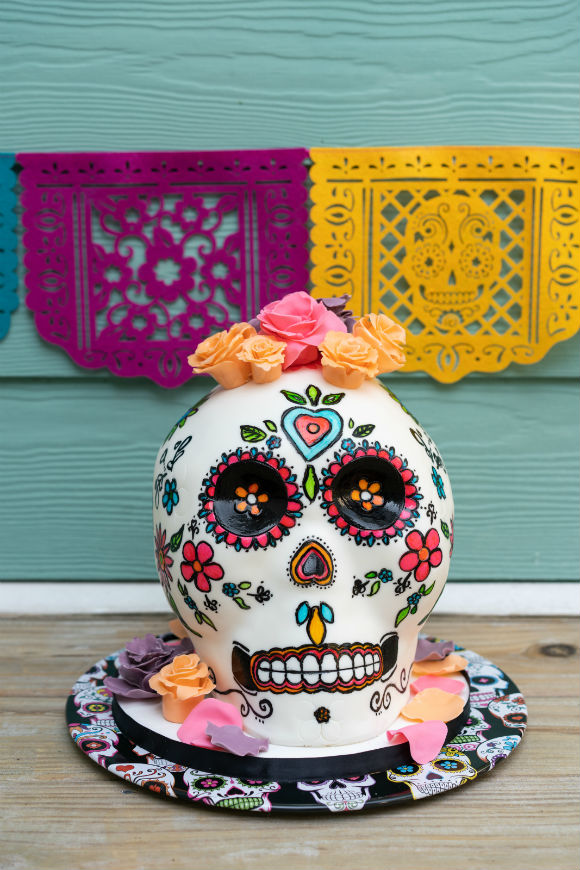
The skull was sculpted from 5 cake layers (yes, he’s entirely edible!) and vanilla buttercream, then covered in fondant and topped with gum paste flowers. The skull design was entirely hand-painted, which took more than 3 hours to paint the whole head.
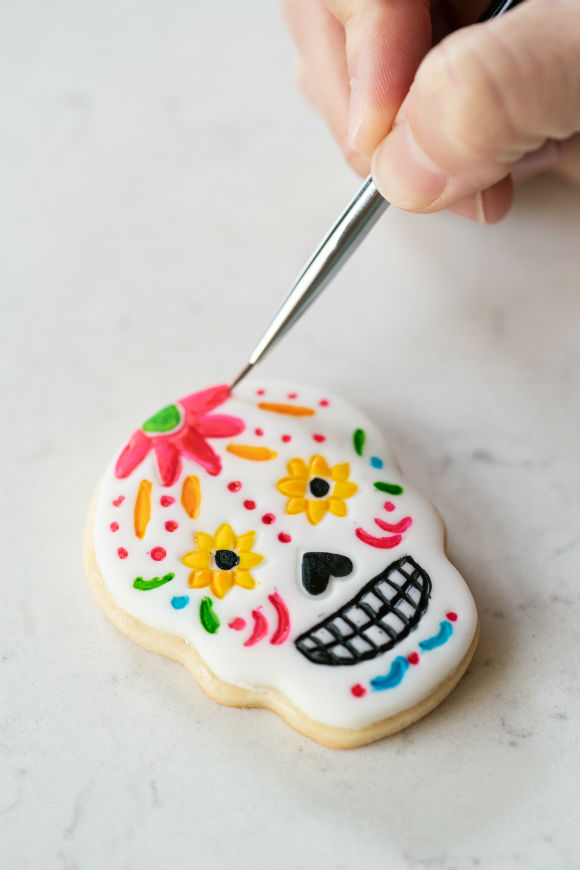
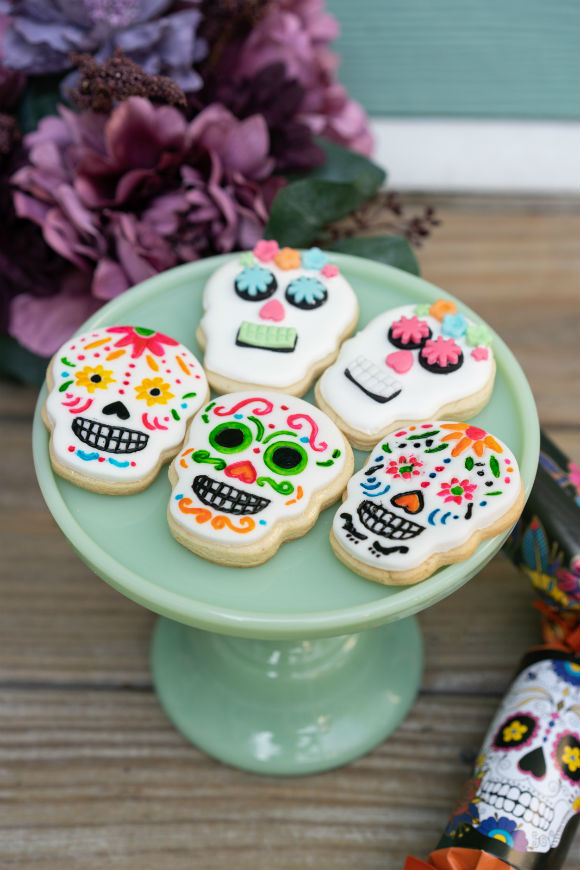
To make the party dessert setup complete, I wanted to add some fun cookies—these mini Day of the Dead skulls were the perfect complement to the cake!
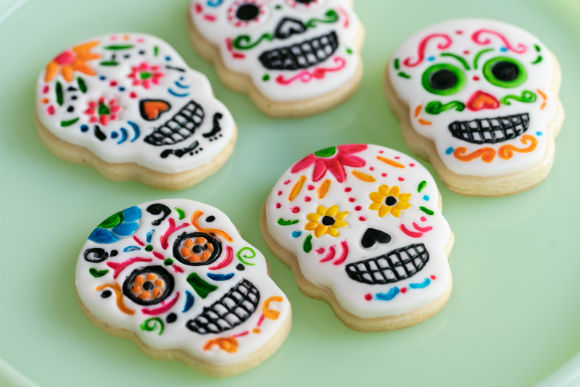
My goal was to show a couple of different ways to decorate Day of the Dead cookies that a baker of any skill level could use as inspiration. Both designs use a combination of royal icing and fondant, and the general steps are outlined below.

How to Hand-Paint Skull Cookies
Ingredients
- Skull-shaped sugar cookies, baked and cooled
- Skull-shaped cookie cutter (same that you used for the cookies)
- small liner and wide paint brushes (I like Wilton's cake brush sets)
- corn syrup
- assortment of gel food clothing (I used sky blue, mint green, rose pink, orange, and black)
- 1-2 tsp vodka
Instructions
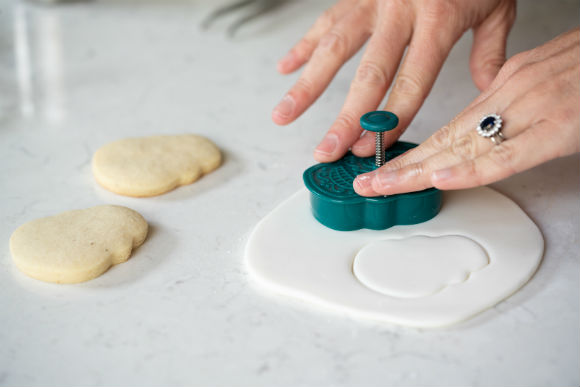
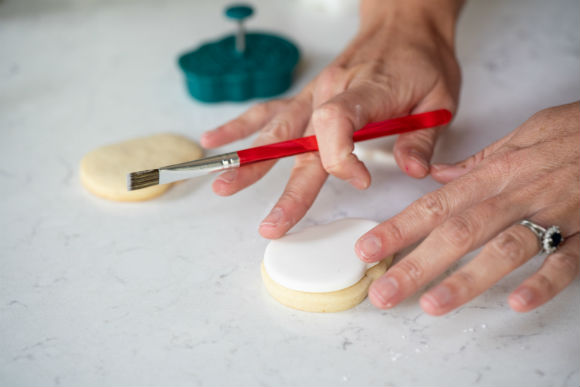
- Roll out your homemade or pre-made fondant until it’s about 1/8″ thick.
- Using your skull-shaped cookie cutter, cut out as many skulls as you have cookies. (Optional: If your cutter is also a cookie stamp, stamp the design into the fondant after it’s cutout.)
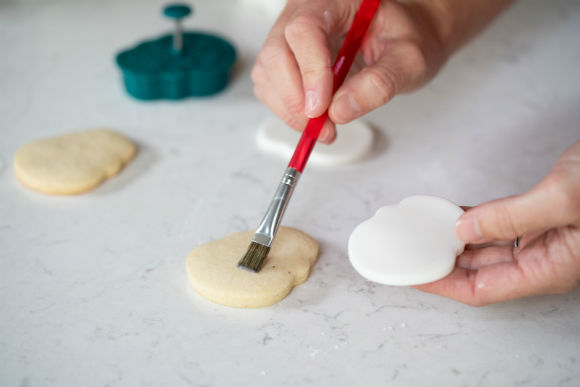
- Using your wide paint brush, lightly brush a small amount of corn syrup onto the cookie, then place the cutout fondant skull onto the cookie. Using your fingers, smooth out any bumps.
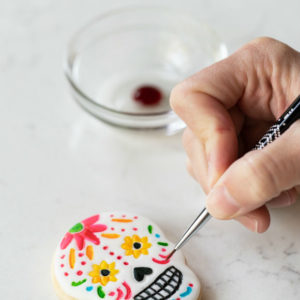
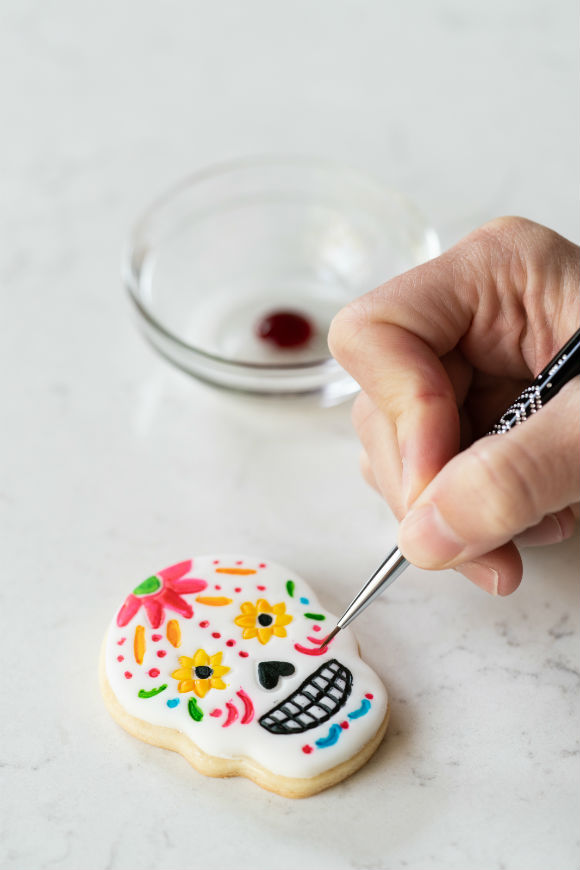
- Place 1-2 drops of each gel food coloring you’re using into separate small ramekins (or a ceramic egg holder works great for this!), then add 1 drop of vodka to each color. Wait a few seconds, then mix together with a paint brush. Do this for every color (the vodka allows the food coloring to dry quickly).
- Time to start decorating! I find it’s easiest to paint your “anchors” first, which are the eyes, nose and mouth. The great thing about Day of the Dead designs are that they are very unique and personal, and there are no wrong options! Using your different colors, try painting different swirls, flowers and dots all around the face until you’re happy with your design.
- Set cookies on a cooling rack to dry. Enjoy! 🙂

How to Decorate Skull Cookies Using Fondant
Ingredients
- Skull-shaped sugar cookies, baked and cooled
- Royal icing
- Homemade or pre-made fondant
- Assortment of gel food coloring (I used sky blue, mint green, rose pink, orange and black)
- 1-2 tsp vodka
- Small liner paint brushes (I like Wilton’s cake brush sets)
- Any standard piping tip (you’ll be using the wide base and not the tip itself)
- Small heart cookie cutter
- Small rectangle cookie cutter
- Assortment of flower fondant stamps
- X-acto knife
Instructions
- Outline your skull cookies with royal icing and allow to dry. Once set, flood your royal icing and fill each outline. Allow at least 5 hours to fully dry, but I find it works best to let dry overnight.
- Using your various food coloring, color a small amount of fondant for each different color.
- Roll out your homemade or pre-made fondant until it’s about 1/8″ thick.
- As with the first design, I find it’s easiest to start with your “anchors” first, which are the eyes, nose and mouth. And as I mentioned above, the great thing about Day of the Dead designs are that they are very unique and personal, and there are no wrong options!
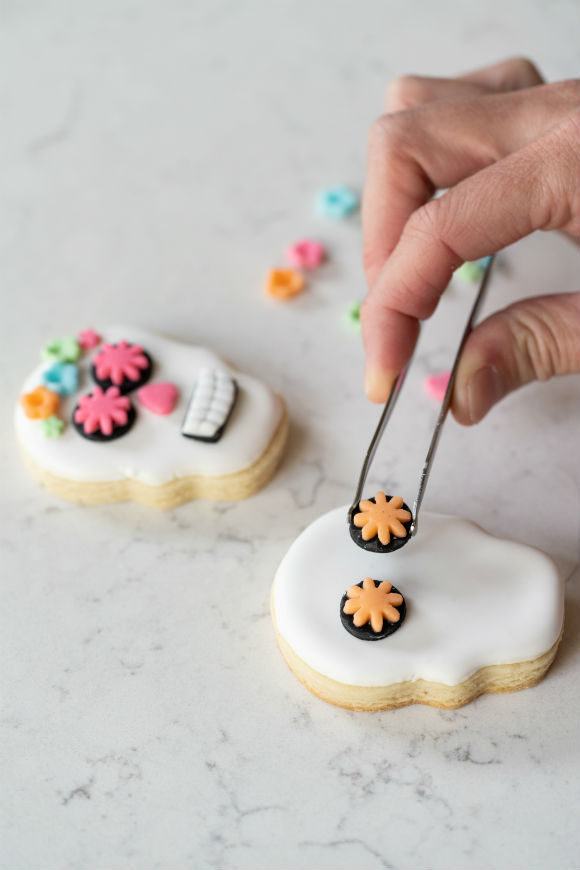
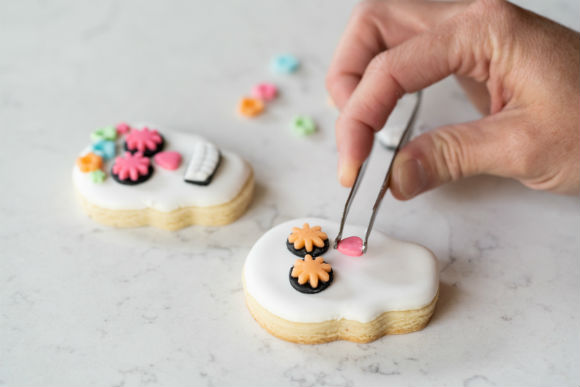
- For the eyes, use the base of your piping tip to cutout two circles (I used black for this).
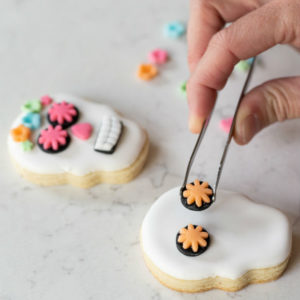
- Using a different color, cutout two flowers, using one of your flower stamps. Using your paint brush, add a small dab of royal icing to the back of each flower and then adhere to the cutout circles. Set aside to dry and firm up. Do two of these for every skull cookie you have.
- Using your small heart cookie cutter, cutout a “nose” for each cookie. Set aside to dry and firm up.
- Using the rest of your colored fondant and flower stamps, continue to cutout various flowers in different sizes and colors. Set aside to dry and firm up.
- Once all of your fondant toppers are firm, adhere to each cookie by placing a small dab of royal icing on your paint brush and then placing onto each cookie.
- Set cookies aside on a cooling rack so royal icing can fully dry. Enjoy! 🙂
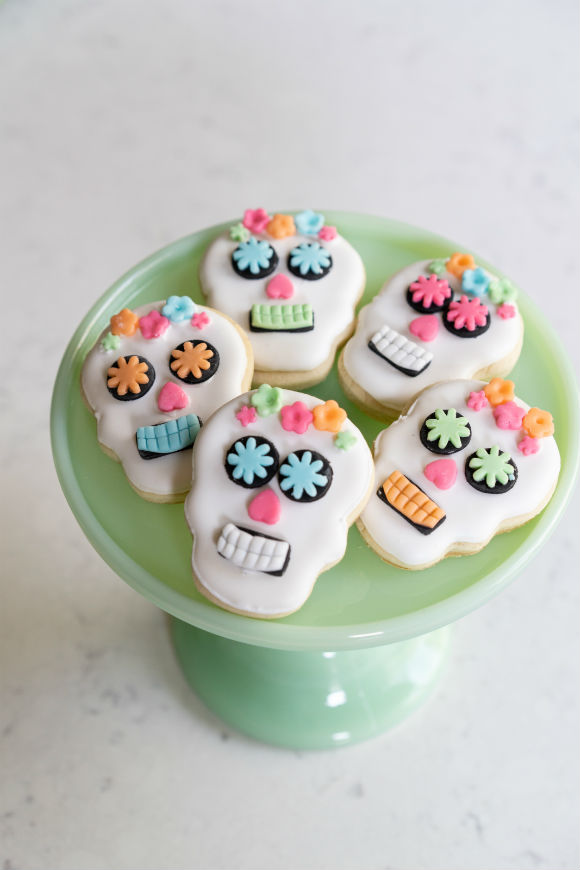
Julie! Thank you for teaching us your techniques for decorating skull cookies for Day of the Dead. These are incredible! Okay, Friends, it is time for us to have a go. Which ones would you try to make first? I think I would go with the fondant covered cookies while I learn how to make and flood royal icing. I am guessing all of it would be a huge hit. And, I am still amazed by that cake!! Julie- you have so much talent!! You can see more of Julie’s talent here (you really should go see what she makes!).
Related Articles
The Best Nantucket Travel Guide
I had never fallen in love with a place before until I met Nantucket 28 years ago- and, let me tell you, I fell hard.…
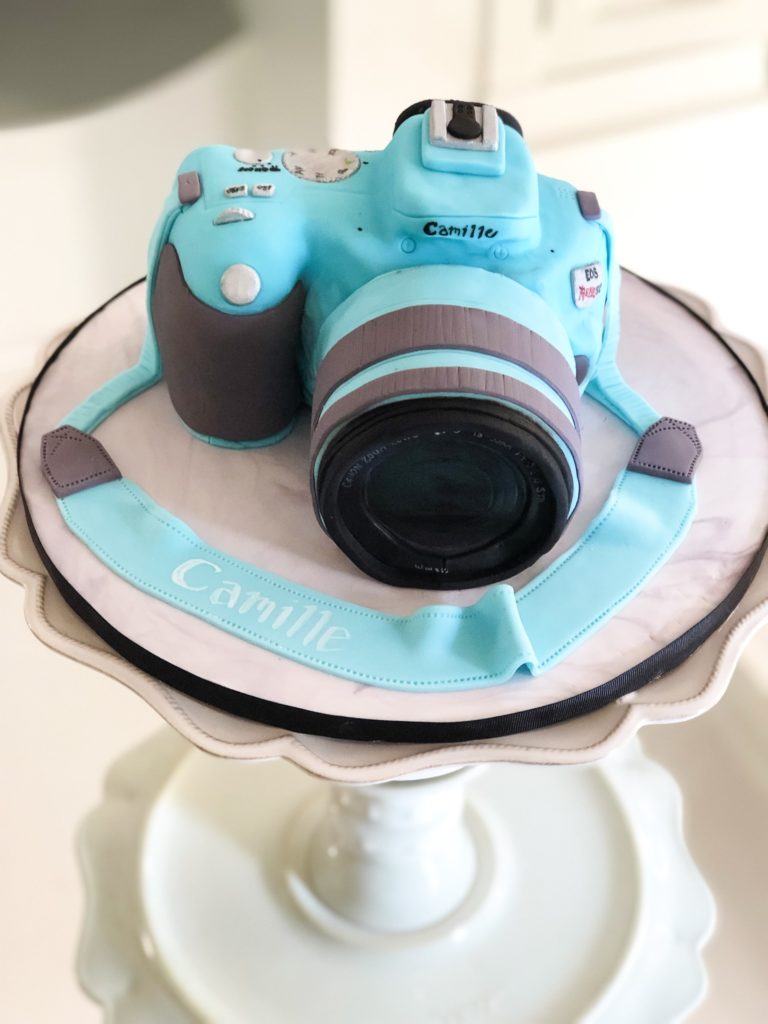
Celebrate with Cake~ Ideas from “For Heaven Bakes”
If you are looking for cake ideas for a birthday, wedding, graduation, baby shower, or any celebration, then I have the baker for you!! Julie…
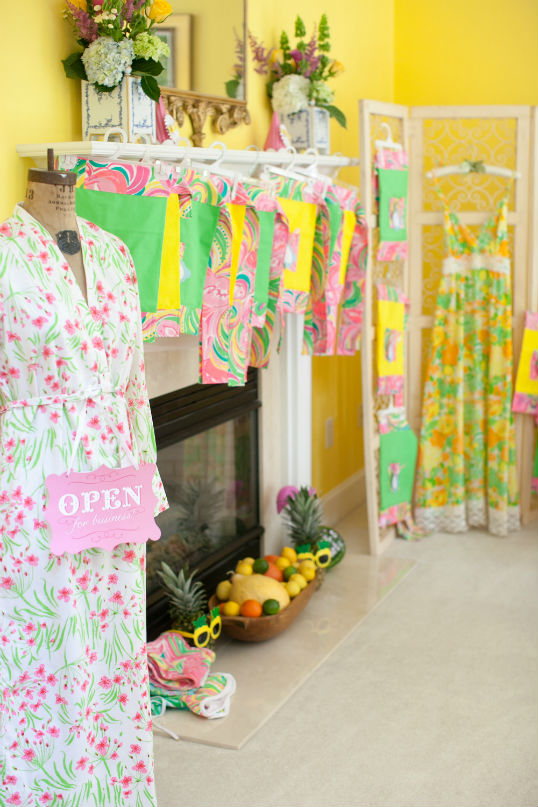
LILLY PULITZER CAKE DECORATING FLAMINGO BIRTHDAY PARTY IDEAS
There is nothing like the bright colors and happy prints of Lilly Pulitzer to make every day feel like a party! For my daughter’s 12th birthday party, she wanted to decorate cakes~ Lilly-style! So, in order to decide how to mesh the two, I kept thinking “if Lilly had a cake shop instead of a juice stand”… I have to admit, this was one fun party to plan! It is a blast to see where ideas go in the hands of a TWEEN! Enjoy and remember, “…being happy never goes out of style!”.

The Supper Club Soiree in Birmingham
The very first Supper Club Soiree was held in Mountain Brook, Al. Mountain Brook is a beautiful village in Birmingham with a quaint feel within…
LITTLE HOUSE ON THE PRAIRIE PARTY
What began as a simple gesture to introduce my daughter to a wonderful book series has become a special evening ritual for us- reading Laura Ingalls Wilder’s Little House books! I must admit, I didn’t realize quite how interesting these books would be to her, but she cannot wait to read all nine in the series. It was only fitting that her birthday party focus around Little House on the Prairie! Together, we had a ball planning all of the details of her party that related to the books in some way. At Camille’s request, we focused on some of her favorite parts of the stories… prairie flowers, covered wagons, tee pees, the colors in the drawings of the books, and “pretty”…because “Ma” liked things to be pretty!

